This tutorial will explain how to configure KEPServerEX and Simcad Pro so that Simcad Pro can write tag values to a SQL Database.
KEPServerEX Configuration
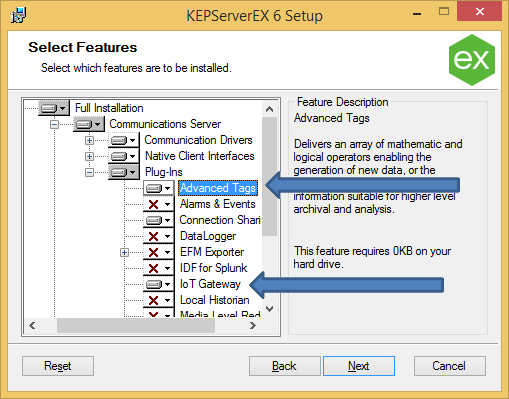
To configure KEPServerEX so that it can be used with Simcad Pro, you must first install the “Advanced Tags” and “IoT Gateway” plugins. To enable these plugins, select them when you install KEPServerEX.
Also, please note that the IoT Gateway requires a 32-bit version of the Java Runtime Environment to be installed on the host computer.
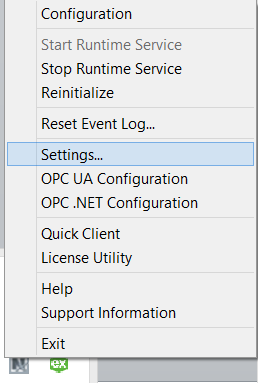
In order to get KEPServerEX 6 to communicate with SQL databases, it must be started in interactive mode. To do this, launch KEPServerEX 6, if it is not already running. Next, right-click the system tray icon, and select “Settings.”
In the dialog that appears, click the “Runtime Process” tab. In the menu for this tab, change the “Selected mode” option to “Interactive.” If this option is greyed out, you must exit KEPServerEX, and restart it as an administrator.
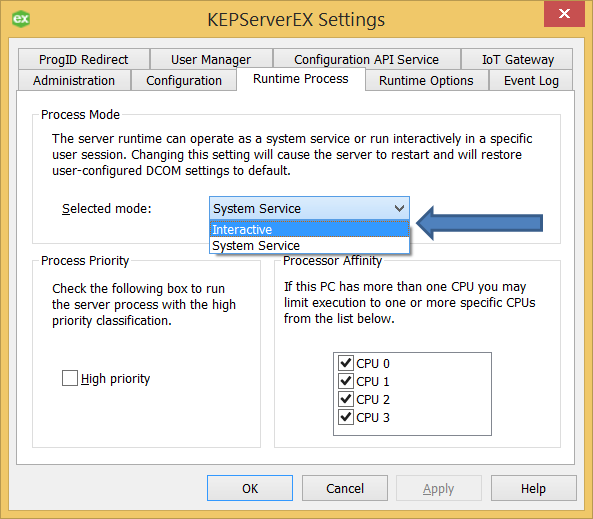
Once this is done, click “OK,” and the program will restart in interactive mode.
Linking KEPServerEX to the PLC
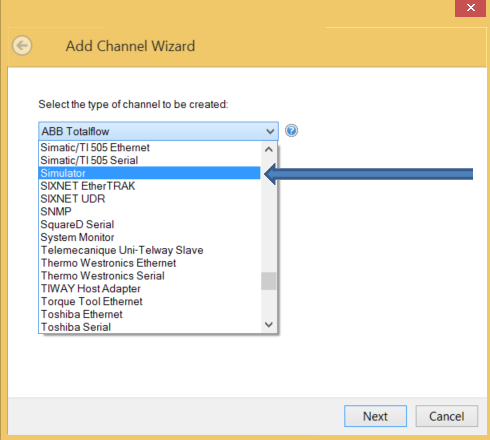
Now that everything is installed and configured, it is time to create the PLC channel. To begin this process, open the “Configuration” menu and right-click the “Connectivity” node. Select “New Channel” and the channel creation wizard will open. For the type of channel, select the driver that your PLC uses. In this case, we will be using the “Simulator” driver.
The channel can be named whatever you want. In this example, we will call it “Channel11.” On the following screens, the “Optimization Method,” “Duty Cycle,” “Floating-Point Values,” “Item Persistence,” and “Data File” options can be left alone. Once this channel has been created, right-click it and select “New Device.” Name this device whatever you want. In this example, we will call it “Device1.” The “Model,” “ID Format,” “ID,” “Scan Mode,” and “Initial Updates from Cache” options can be left at their defaults. Click “Finish” and a new device will be created.
Finally, we can create a new tag. To do this, right-click the device and select “New Tag.” In the window that opens, type whatever you want for the “Name” and “Description” fields. In this example, we will call it “TestNum,” with the description “numeric value.” In the “Address” field, you should specify the type of tag that it should be. In this example, we will use “K0000.”
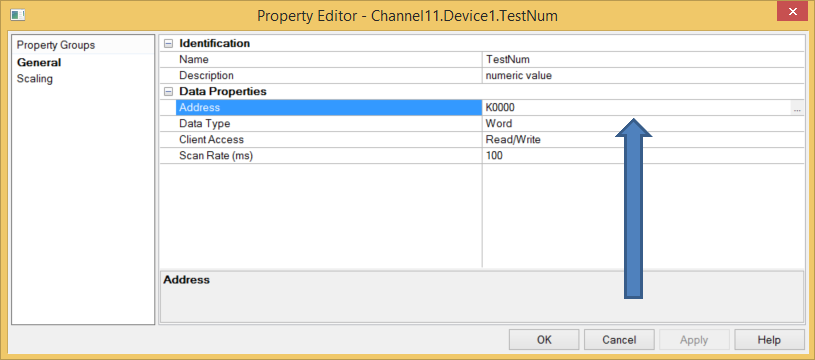
The “Data Type,” “Client Access,” and “Scan Rate (ms)” fields can be left alone. Finally, click “OK” and a new tag will be created.
Making the Tag Accessible to Simcad Pro
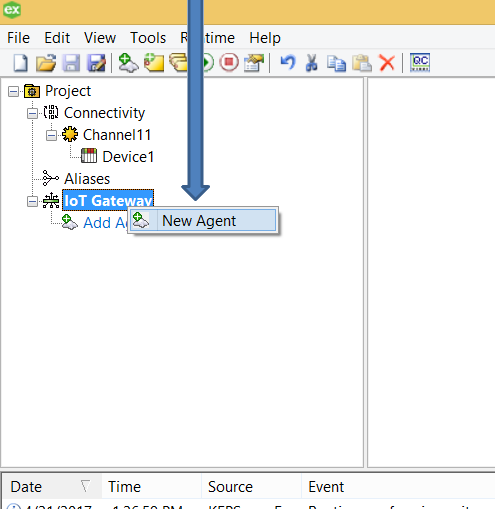
Simcad Pro relies on the functionality provided by the “IoT Gateway” plugin in order to send and receive data to the PLC. If this plugin is not installed, install it by following the steps in “KEPServerEX Configuration.” Once the plugin has been installed, the tag can be registered with it. To do this, right-click the “IoT Gateway” node at the bottom of the list on the left-hand side of the “KEPServerEX 6 Configuration” screen. In the menu that appears, select “New Agent.”
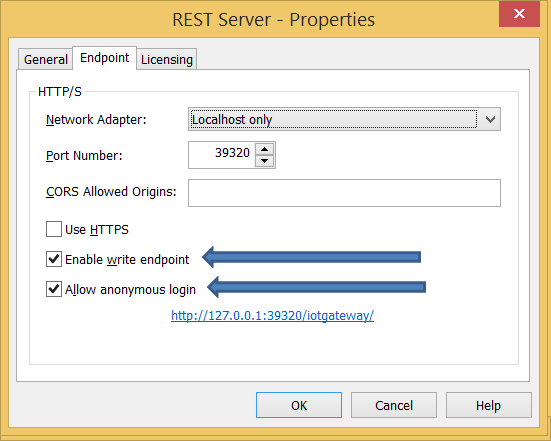
This will open a dialog asking for information about this agent. The name can be anything you want. For the type, select “REST Server.” Now, you will see another dialog asking for network information. The “Network Adapter,” “Port Number,” and “CORS Allowed Origins” fields can be left alone. Also, uncheck “Use HTTPS,” check “Enable write endpoint,” and check “Allow anonymous login.”
Once everything is set, click “Finish.” You will now see a new “REST Server” node underneath the “IoT Gateway” option. To add a tag to this node, either right click it and select “New IoT Item,” or click the “Add IoT items…” field in the right-hand pane. This will open the tag browser, which will show all channels, devices, and tags on your system.
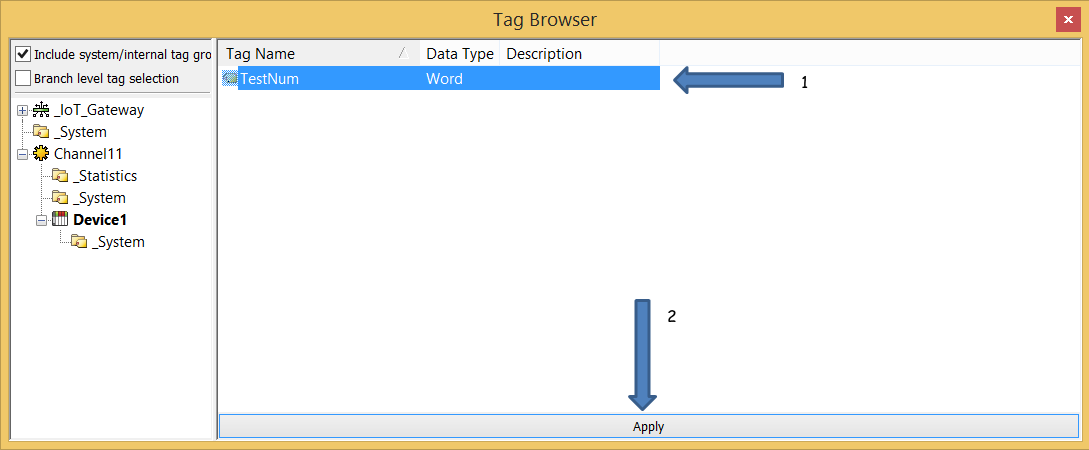
In this dialog, select whichever tag(s) you want to import, and click “Apply.” This concludes the process of setting up the IoT Gateway.
Creating a New Simcad Pro Project
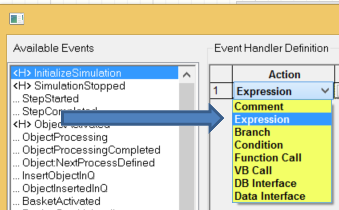
Next, you must make a new Simcad Pro project for sending and receiving requests to and from the server. First, create a Start Process and a Generic Process. These can be named whatever you want. Next, drag an Interprocess Connection from the Start Process to the Generic Process. Right-click the Generic Process, and choose “Item Properties.” In the properties window, click the “+ Customize” button, which will open a bar on the right side with additional options. Find and click on the “Extensions/Event Handling” button. This will open another dialog with the “InitializeSimulation” section already selected. Click “Insert Line” and a new “Comment” line will appear. Change this to an “Expression” line by clicking on the “Action” drop-down menu.
Next, click the button under the “Edit” header. This will open the “Define Expression” dialog. In the main text area, type the following:
ConnectWebInterface( '127.0.0.1', 39320, 0, 1)
This tells Simcad Pro to look for KEPServerEX on the local machine at port 39320. Click “OK” and you will see the expression that you just typed (prepended with an equals sign) under the “Definition” header. Next, click on the “Simulation Stopped” field in the left-hand list. For this field, do the same thing, with the only difference being that the expression should be:
DisconnectWebInterface()
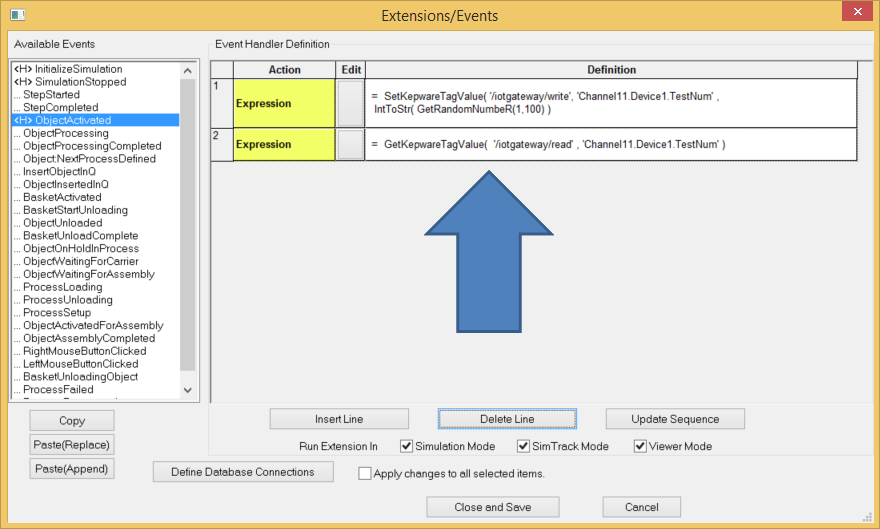
This tells Simcad Pro to close the connection to KEPServerEX when the simulation is stopped. Next, click on the “ObjectActivated” field on the left-hand side. For this field, make two expressions. The first should contain this string:
SetKepwareTagValue( '/iotgateway/write', 'Channel11.Device1.TestNum' , IntToStr(GetRandomNumbeR(1,100) )
The second should contain this string:
GetKepwareTagValue( '/iotgateway/read', 'Channel11.Device1.TestNum' )
These expressions tell Simcad Pro to update the tag with a randomly chosen number between 1 and 100, and to retrieve this new value.
To verify that this is actually working, close and save everything, and run the simulation. You should see boxes being sent from the Start Process to the Generic Process. Pause the simulation. Next, open the KEPServerEX Configuration screen, and navigate to “Tools->Launch OPC Quick Client.” In the dialog that opens, you will see a menu on the left-hand side. In this menu, click on the name of the device that contains the tag that is being modified (in this case it is “Channel11.Device1”). After doing this, you will see the tag(s) for this device on the right-hand side. If you look under the “Value” header, you will see a certain value.
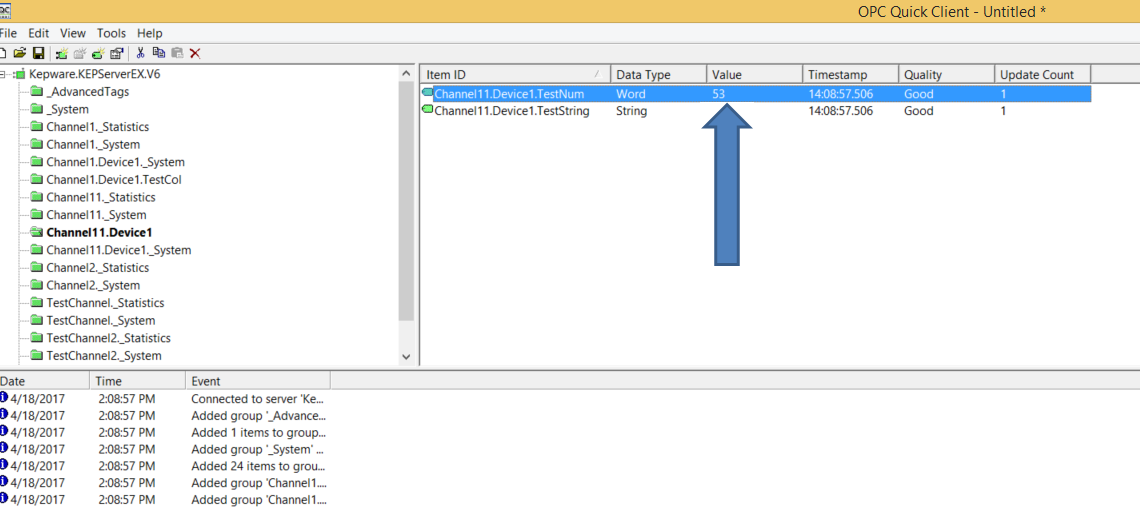
Now, go back into Simcad Pro, and resume the simulation. After a few seconds, go back to the OPC Quick Client. If you see a different value, congratulations, you have successfully enabled writing to a PLC tag and database!
In conclusion, this document shows how you can allow Simcad Pro to write values from a PLC tag to a SQL database. If you have any questions, feel free to contact CreateASoft, Inc.’s support by visiting https://createasoft.com/Product-Support.